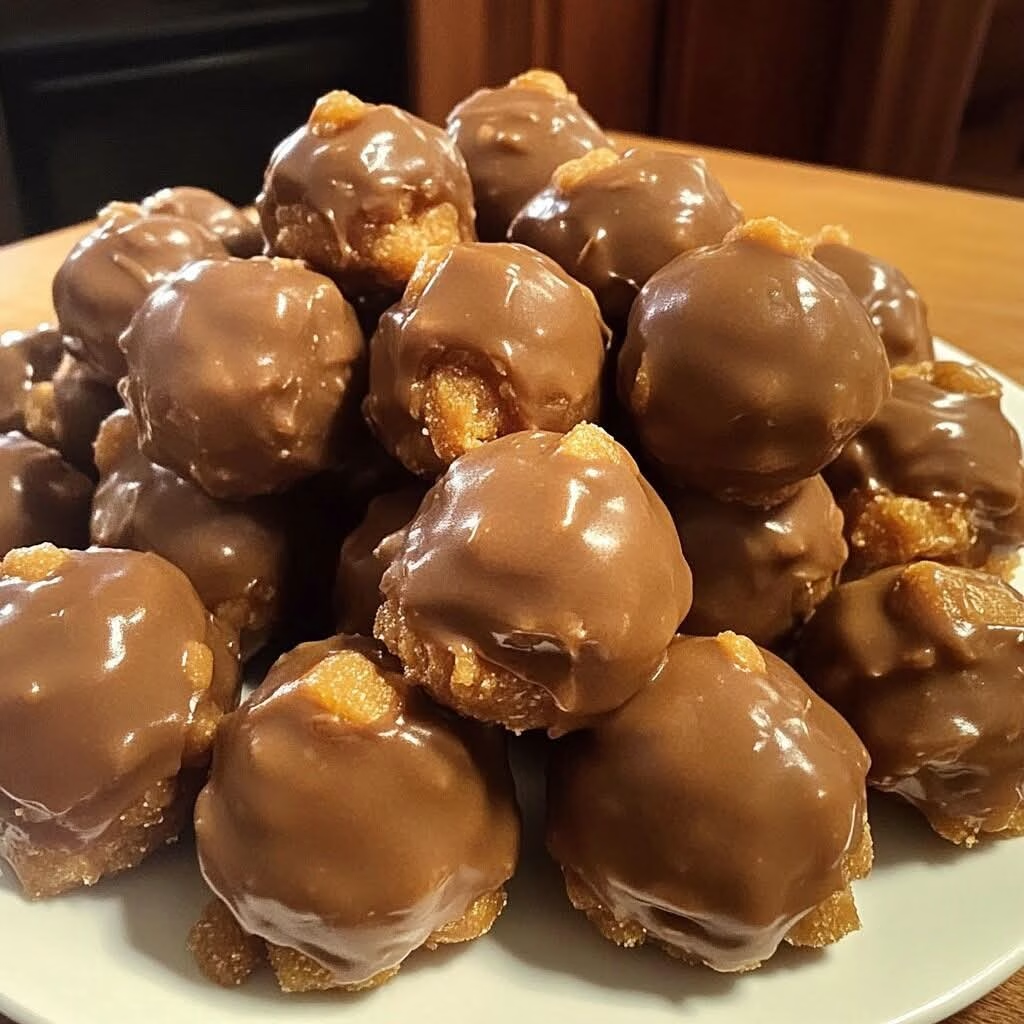
Butterfinger Balls — No-Bake Peanut Butter & Candy Truffles
These Butterfinger Balls are a decadent, no-bake confection that marries creamy peanut butter, crunchy graham crumbs, and the unmistakable flaky crunch of Butterfinger candy — all dipped in glossy chocolate. They’re perfect for parties, holiday tins, or a quick homemade gift that looks gourmet with almost no effort.
Why you’ll love these Butterfinger Balls
Think of a classic peanut-buttery truffle with an added layer of candy-bar nostalgia. Each bite delivers a creamy, slightly salty **peanut butter center**, a subtle crunch from **graham cracker crumbs**, and bursts of brittle, sweet **Butterfinger** shards. When coated in chocolate, the contrast of textures — smooth, crunchy, flaky — makes these treats utterly addictive. They’re no-bake, kid-friendly, and scale beautifully for crowds.
Ingredients & why each matters
Below is a detailed ingredient list with the role each component plays in the recipe. Understanding these will help you tweak the recipe confidently.
- Softened butter — 4 tablespoons (½ stick)
Adds richness and a silky mouthfeel while helping bind the peanut butter mixture so the balls hold their shape. - Vanilla extract — 1 teaspoon
A small splash of **vanilla** amplifies sweetness and rounds the peanut flavor without making it overtly vanilla-forward. - Chocolate bark or chocolate chips — 8 ounces
The exterior shell. Use high-quality chocolate for a glossy finish and clean snap. Bark melts easily and often contains stabilizers that help set faster. - Crushed Butterfinger bars — ½ cup (finely crushed)
Provides the signature Butterfinger crunch — flaky, crisp shards folded into the dough for texture and candy-bar flavor in every bite. - Powdered sugar — 1 cup
Sweetens and helps dry the mixture slightly so it’s easier to roll. Powdered sugar dissolves smoothly into peanut butter for a creamy, uniform center. - Peanut butter (not all-natural) — 1 cup
The foundation of the confection. Standard commercial peanut butter contains stabilizers that keep the balls firm and make them easier to shape — ideal for this recipe. - Graham cracker crumbs — ¾ cup
Adds body, mild sweetness, and a subtle toasted flavor. These crumbs absorb slight moisture from the peanut butter and make the texture pleasantly crumbly rather than greasy. - Optional garnishes — crushed Butterfinger, sprinkles, coarse sea salt
Garnishes add visual appeal and an extra layer of texture or salty-sweet contrast to balance the chocolate and peanut butter.
Equipment
- Large mixing bowl and rubber spatula
- Electric mixer or sturdy wooden spoon
- Baking sheet lined with parchment paper
- Small cookie scoop or tablespoon
- Microwave-safe bowl or double boiler for melting chocolate
Step-by-step instructions
- Prepare the base: In a medium mixing bowl, combine 1 cup peanut butter and 4 tablespoons softened butter. Beat on medium speed until smooth and uniformly creamy. Scrape down the sides of the bowl so everything is evenly incorporated.
- Add vanilla and sugar: Add 1 teaspoon vanilla extract, then gradually add 1 cup powdered sugar in 2–3 additions. Mix on low until the sugar is fully integrated and the mixture is thick and scoopable.
- Fold in crumbs and candy: Gently fold in ¾ cup graham cracker crumbs and ½ cup crushed Butterfinger pieces. Fold just until combined — you want visible fragments of Butterfinger for crunch.
- Shape the balls: Line a baking sheet with parchment. Use a small cookie scoop or teaspoon to portion roughly 1 to 1½ tablespoons of dough, then quickly roll into smooth balls between your palms. Place on the parchment-lined sheet. If the mixture is sticky, chill 10 minutes first.
- Chill until firm: Pop the tray into the freezer for about 30 minutes, or refrigerate for at least 1 hour, until the balls are solid enough to dip without collapsing.
- Melt the chocolate: Melt 8 ounces chocolate bark or chips in 30-second bursts at 50% power in the microwave, stirring between bursts until smooth. Alternatively, melt over a double boiler, stirring until fully fluid and glossy.
- Dip the balls: Using a fork or dipping tool, submerge a chilled ball in melted chocolate, tap off excess, then return to the parchment. If desired, immediately sprinkle extra crushed Butterfinger, sprinkles, or a pinch of coarse sea salt on top before the chocolate sets.
- Set and store: Let the chocolate fully set at room temperature (or speed it up in the fridge for 10–15 minutes). Store finished Butterfinger Balls in an airtight container in the refrigerator for up to 7 days or freeze for longer storage.
Why this recipe is loved
People go crazy for these Butterfinger Balls because they combine comfort flavors with candy-bar nostalgia. The recipe is no-bake, fast, and perfect for personalization — swap the candy, roll them in nuts, or drizzle extra chocolate. They’re sturdy enough for packaging and gifting yet deliciously luscious to enjoy at home.
Pro tips for perfect Butterfinger Balls
- Temperature control: Chill the balls until quite firm before dipping — this prevents them from absorbing too much chocolate and keeps the centers intact.
- Choose non-natural peanut butter: Stabilized peanut butter helps the mixture bind better and prevents oil separation over time.
- Melt chocolate gently: Overheated chocolate can seize. Stir frequently and use low heat in the microwave or a double boiler.
- Get clean slices: For serving or photography, use a warm knife and cut neat halves to show the textured interior.
- Customize: Stir in tiny toffee bits, mini M&M’s, or a teaspoon of instant espresso powder for a subtle mocha kick.
Serving suggestions
Serve these Butterfinger Balls on a pretty platter with parchment doilies for parties, pack them in cellophane bags tied with ribbon for gifts, or arrange them in mini paper cups alongside coffee or dessert wine. They pair especially well with cold milk, espresso, or a salted caramel drizzle to heighten the sweet-salty interplay.
Variations & substitutions
- Nut-free option: Substitute sunbutter or soy nut butter and ensure all other ingredients are nut-free.
- Chocolate variety: Use dark, milk, or white chocolate bark depending on the sweetness level you prefer.
- Extra crunch: Fold in toasted chopped peanuts or use crushed graham and pretzel mix for a salty twist.