Irresistible Layered Custard Cake – Fluffy, Creamy & Effortlessly Elegant
If you’re hunting for a dessert that looks bakery-made yet comes together with pantry staples, this Layered Custard Cake is your sweet spot. Two tiers of pillowy sponge cake cradle a generous layer of silky vanilla custard, then the whole beauty is finished with cloud-soft whipped cream. It’s refined enough for birthdays and holidays, but simple enough for Sunday dinner—and it slices like a dream.
Ingredients & What Each One Does
For the Sponge Cake
- 4 large eggs (room temperature): Whip to a thick foam that gives the cake its lift and airy crumb.
- 1 cup (200 g) granulated sugar: Sweetens and helps stabilize the egg foam to the ribbon stage.
- 1/2 cup (120 ml) whole milk: Adds moisture and a tender bite.
- 1/2 cup (120 ml) vegetable oil: Keeps the sponge soft even after chilling—ideal for refrigerator cakes.
- 1 tsp vanilla extract: Layers in warm, classic vanilla aroma.
- 1 1/2 cups (190 g) all-purpose flour: Provides the structure while staying delicate when folded gently.
For the Custard Cream
- 3 cups (720 ml) whole milk: The creamy base for a lush pastry cream.
- 3 large egg yolks: Add richness and help the custard set smoothly.
- 3/4 cup (150 g) granulated sugar: Sweetens and gives a subtle caramel warmth when heated.
- 1/3 cup (40 g) cornstarch: Thickens without heaviness for a silky finish.
- 1 tsp vanilla extract: Infuses the cream with classic vanilla flavor.
- 2 tbsp unsalted butter: Adds shine and suppleness once off heat.
For Assembly & Topping
- 1 cup (240 ml) heavy whipping cream: Whips into a feathery topping that balances the custard.
- 2 tbsp powdered sugar: Lightly sweetens the cream without grit.
- Fresh fruit or chocolate shavings (optional): Adds color, texture, and a finishing flourish.
Before You Start
- Room-temp eggs whip higher and faster—pull them out 30 minutes ahead.
- Weigh ingredients if possible for bakery-level consistency.
- Line pans with parchment to avoid sticking and keep edges tidy.
Step-by-Step Instructions
- Prep the pans. Heat oven to 350°F (175°C). Line two 9-inch (23 cm) round pans with parchment circles; lightly grease the sides.
- Whip the eggs & sugar. In a stand mixer with whisk (or hand mixer), beat eggs and sugar on high until pale, tripled in volume, and thick ribbons fall from the whisk—about 6–8 minutes.
- Warm the liquids. In a small saucepan, gently heat the milk and oil until just hot to the touch (not boiling). Stir in vanilla.
- Fold in dry ingredients. Sift the flour. Using a wide spatula, fold half into the egg foam with light, sweeping motions. Stream in the warm milk–oil along the bowl’s side, then fold in the remaining flour just until no streaks remain.
- Bake. Divide batter between pans. Bake 22–26 minutes until the centers spring back and a toothpick comes out clean. Cool in pans 10 minutes, then invert onto racks and cool completely.
- Make the custard. Heat milk in a saucepan to steaming. In a bowl, whisk yolks, sugar, and cornstarch until smooth. Slowly whisk in the hot milk. Return mixture to the saucepan and cook over medium, whisking constantly, until thick bubbles pop and the custard mounds—about 3–5 minutes. Off heat, whisk in vanilla and butter. Press plastic wrap directly on the surface; cool to room temp, then chill until spreadable.
- Whip the topping. Beat heavy cream with powdered sugar to soft peaks. Keep refrigerated.
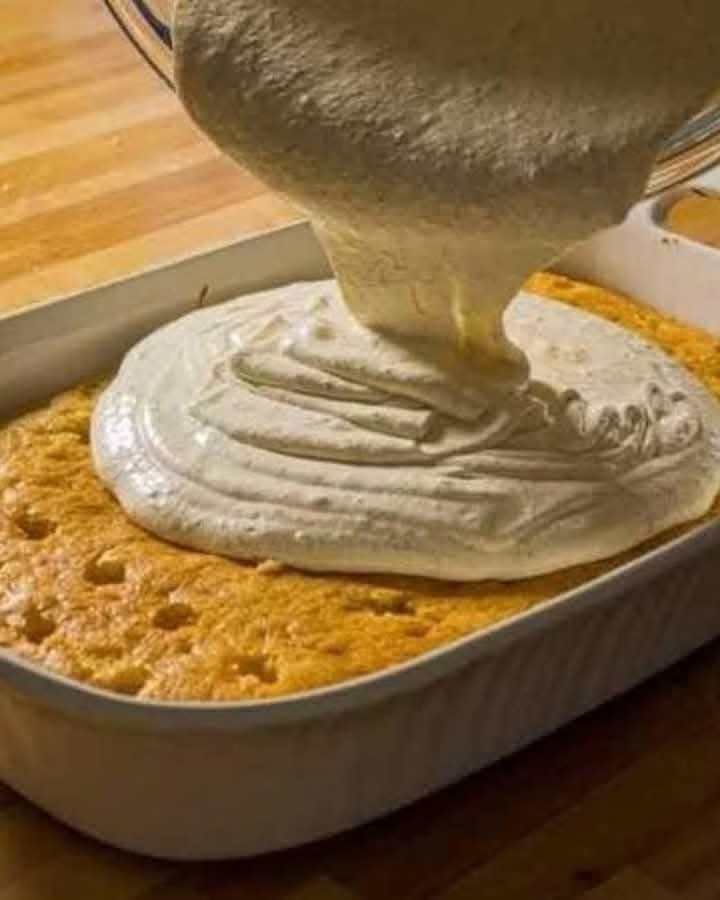
- Level & layer. If needed, use a serrated knife or cake leveler to trim domes. Place one sponge on a platter. Spread a thick layer of custard cream edge-to-edge. Top with the second sponge.
- Finish & chill. Swirl the whipped cream over the top (and sides, if you like). Decorate with fresh berries or chocolate shavings. Chill at least 1 hour before slicing so flavors meld and layers set.
Why This Recipe is Loved
- Versatile showstopper: Perfect for birthdays, holidays, or a relaxed Sunday dinner.
- Elegant yet simple: The method is straightforward, and the result looks bakery-crafted.
- Make-ahead friendly: All components can be prepared in advance for stress-free entertaining.
- Balanced textures: Airy sponge + silky custard + feather-light cream = pure harmony.
Pro Tips for Success
- Room-temperature ingredients ensure better emulsification and maximum volume.
- Don’t rush the whip: Achieving the ribbon stage is your built-in leavening—aim for thick, stable foam.
- Sift the flour to avoid lumps and keep the crumb light.
- Fold gently: Overmixing deflates the batter and leads to a dense cake.
- Chill the custard until cool and spreadable to prevent sliding layers.
- Stabilize the cream (optional) with 1 tsp cornstarch or 1 tsp instant vanilla pudding mix if the cake will sit out longer.
Flavor Variations
- Lemon custard: Add 1 tsp lemon zest to the custard and finish with berries.
- Chocolate veil: Whisk 2 tbsp cocoa into the whipped cream for a light cocoa topping.
- Coffee note: Brush cake layers with cooled espresso for a tiramisu-adjacent vibe.
- Fruit layer: Add sliced strawberries or peaches between custard and sponge.
Serving Suggestions
- Fresh berries or a raspberry coulis to brighten the creamy layers.
- Dark chocolate curls for a touch of bitterness and drama.
- Toasted almonds or pistachios for delicate crunch.
- Drinks: Serve with hot tea, cappuccino, or a lightly sweet Moscato.
Make-Ahead & Storage
- Bake ahead: Sponge layers keep well wrapped at room temp for 1 day or refrigerated for 2 days.
- Custard: Refrigerate up to 3 days. Whisk to loosen before spreading.
- Assembled cake: Cover and refrigerate up to 24 hours before serving.
Freezing & Reheating
- Freeze sponge only: Wrap tightly and freeze up to 2 months. Thaw overnight in the fridge.
- Avoid freezing finished cake (custard can weep upon thawing). Assemble fresh for best texture.
Printable Recipe – Layered Custard Cake
Yield: 12 servings | Prep: 35 mins | Bake: 22–26 mins | Chill: 1 hr+
Ingredients
Sponge Cake
- 4 large eggs (room temperature)
- 1 cup (200 g) granulated sugar
- 1/2 cup (120 ml) whole milk
- 1/2 cup (120 ml) vegetable oil
- 1 tsp vanilla extract
- 1 1/2 cups (190 g) all-purpose flour
Custard Cream
- 3 cups (720 ml) whole milk
- 3 large egg yolks
- 3/4 cup (150 g) granulated sugar
- 1/3 cup (40 g) cornstarch
- 1 tsp vanilla extract
- 2 tbsp unsalted butter
Topping
- 1 cup (240 ml) heavy whipping cream
- 2 tbsp powdered sugar
- Fresh fruit or chocolate shavings (optional)
Instructions
- Preheat oven to 350°F (175°C). Line two 9-inch round pans with parchment; lightly grease sides.
- Whip eggs and sugar on high 6–8 minutes to thick ribbon stage.
- Warm milk and oil until hot to the touch; stir in vanilla.
- Sift flour. Fold in half; stream in warm liquid along bowl side; fold in remaining flour just to combine.
- Divide batter into pans; bake 22–26 minutes. Cool 10 minutes; turn out and cool completely.
- For custard: Heat milk to steaming. Whisk yolks, sugar, and cornstarch; temper with hot milk. Cook, whisking, until thick and bubbling. Off heat, whisk in vanilla and butter. Cover surface; cool, then chill.
- Whip cream and powdered sugar to soft peaks; chill.
- Assemble: Level layers if needed. Spread custard over first layer; top with second. Finish with whipped cream and optional fruit or chocolate. Chill 1 hour before slicing.
Final Thoughts
This Irresistible Layered Custard Cake proves that stunning desserts don’t need complicated techniques. With a fluffy sponge, silky homemade custard, and dreamy whipped cream, it’s simple, elegant, and endlessly crowd-pleasing. Use the tips above for guaranteed success, tailor the flavors to your celebration, and watch every plate come back clean. One slice, and you’ll understand why this cake earns a permanent spot in your dessert rotation.

